Today’s post is brought to us by Brynn of Dandy & Fine Parties
Gal pals are the absolute best (and I have a feeling you would agree!) Who else can you hang out with in your pjs—gabbing about anything and everything that’s on your mind? I appreciate my girlfriends more than they know, which is why I want to throw them a little extra love this Valentine’s errr, Galentine’s Day! This official holiday takes place on February 13 (and it’s way more fun than Valentine’s Day!) So, in honor of my lovely lady friends, I am hosting a little shindig where we will eat, drink, be merry, and craft together! Continue reading to learn more about my festive tips on throwing your very own Galentine’s Craft Party!
TIP no.1: KEEP IT EASY
From experience, I’ve learned it’s best to simplify when throwing a craft party. When getting a big group of friends together, it’s likely that you’ll have at least a couple of people that aren’t innately crafty. It’s best to have an organized craft that can be prepared ahead of time—one that you can also give a quick tutorial on. And even better is to build sweet little craft kits for each of your gals!
TIP no.2: COLOR, COLOR, COLOR
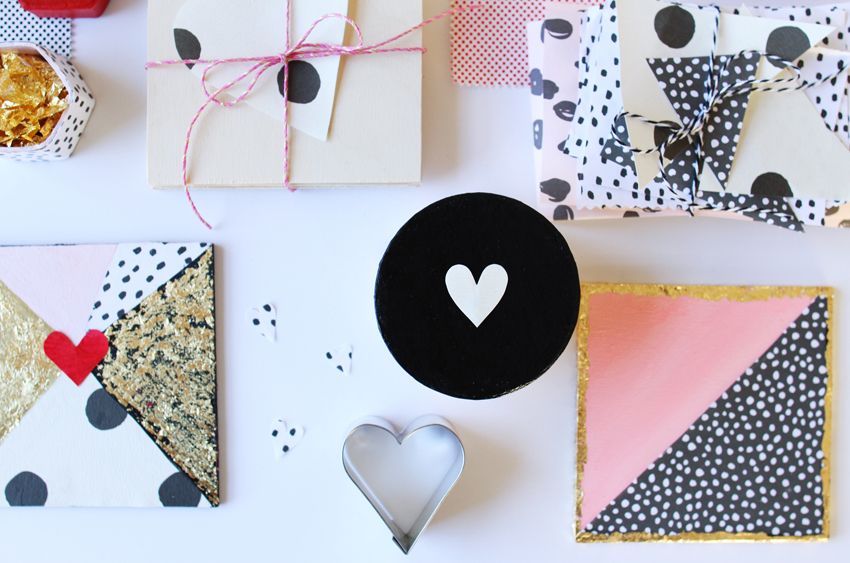
Make sure to narrow down your color palette. If you already have craft supplies on hand, I find that it’s super helpful to pull out what you already have. Find out what colors are most prominent in your collection and go from there. If you have a ton of blues and greens, but are dead set on pinks and reds, you’ll need to determine if it’s in your budget to hit up your favorite art and craft stores (we all know it adds up!) Otherwise, be savvy and think outside of the box when incorporating what you already own. I went mostly traditional with this one (since Galentine’s Day only comes around once a year!) and stuck with pinks, gold, and a pop of red. I also modernized the color palette with some black and white patterns. Don’t be afraid to venture out of the norm and use a combo mint green, red, and gold. It’s all about being creative!
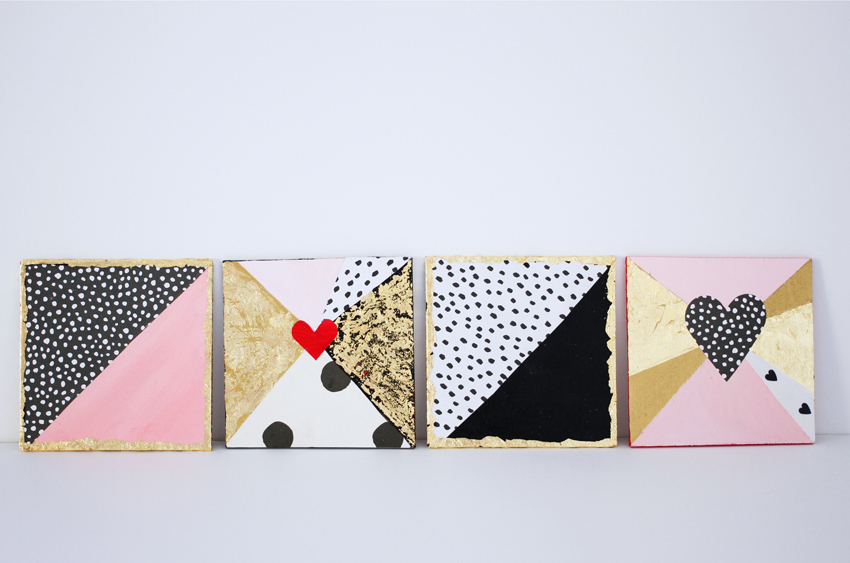
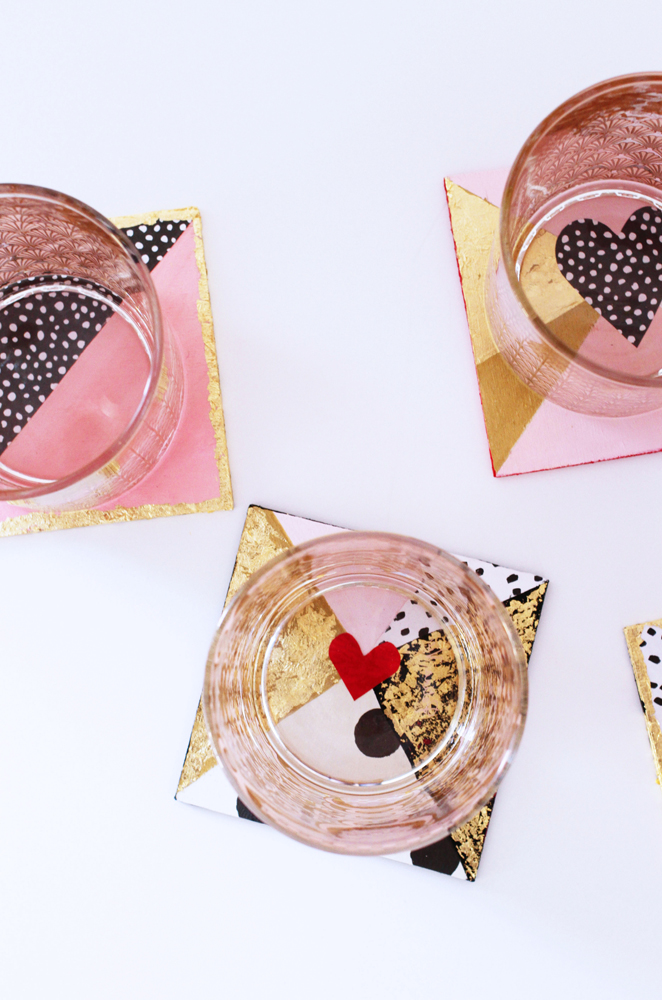
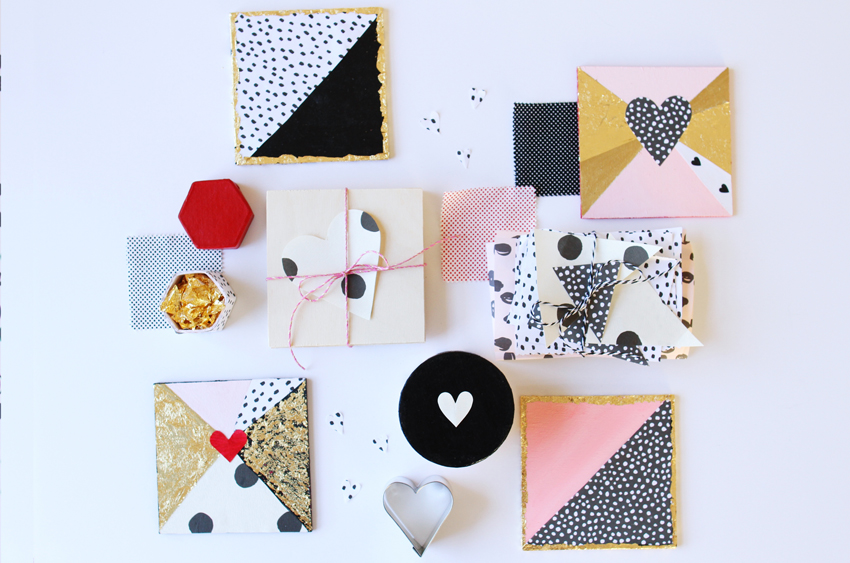
DIY: MIXED MEDIA COASTERS with GOLDFOIL DETAILS
In the past, I’ve made some DIY items that never get used, so I’m making an effort to create items that are applicable to everyday living (and therefore won’t just take up space or end up in the waste bin!) I played around with several ideas before finally landing on these sweet little coasters. They are super adorable as well as extra practical. Win, win! And if you could stand to part with them, I think they would make such a cute hostess or housewarming gift!
– Supplies –
Items for individual kits:
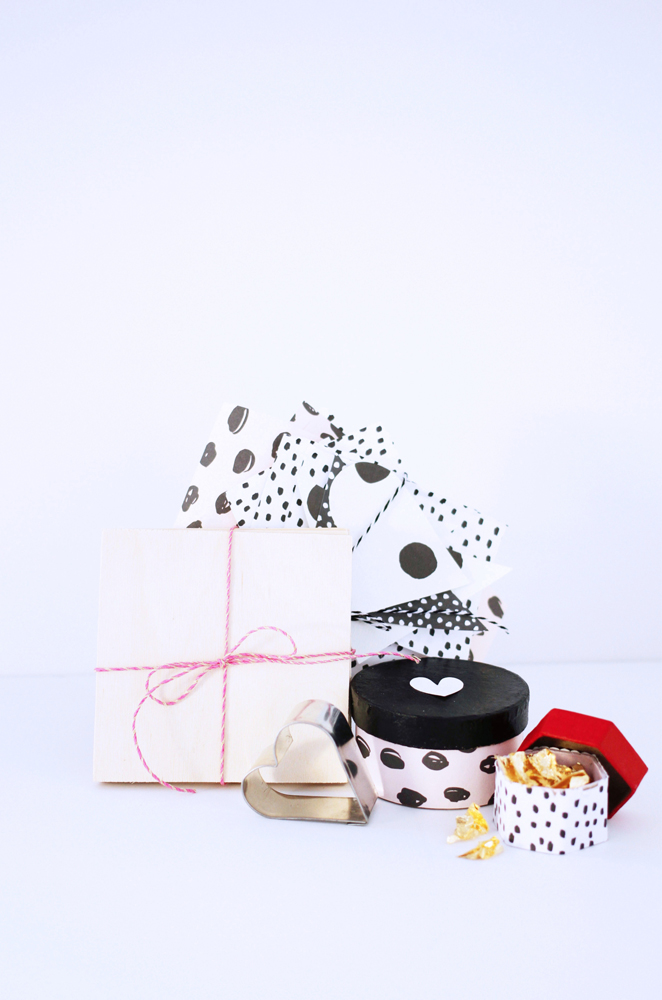
- (4) 4×4 blank birch squares (available at most craft stores or order similar here on Amazon)
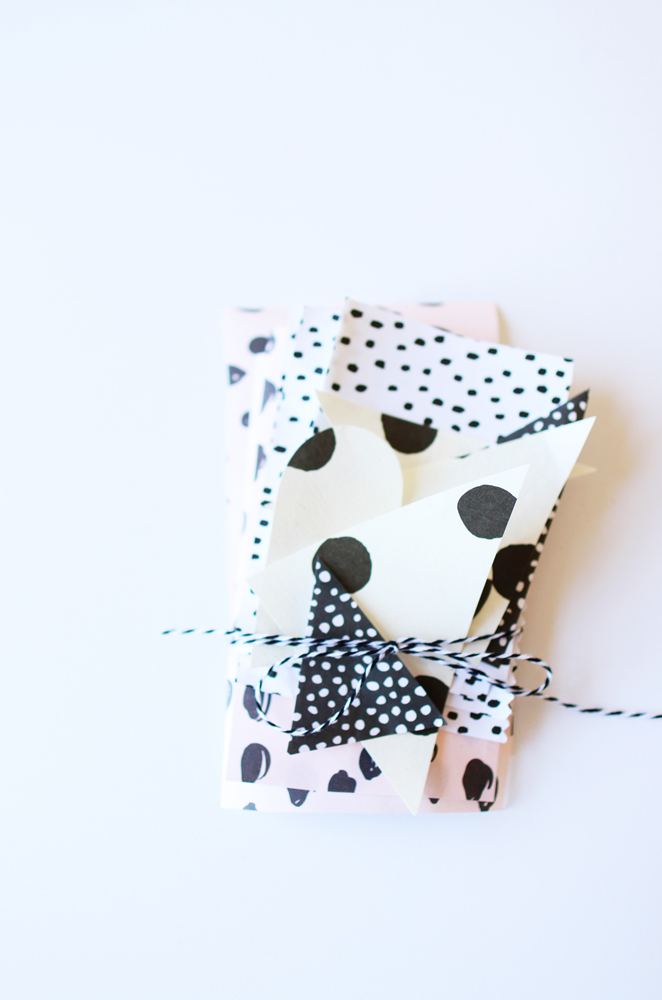
- scraps of paper (I simply cut up miscellaneous patterned wrapping paper I had lying around)
- small heart-shaped cookie cutter (for tracing) + mini box* for storage
- a sheet of gold foil torn into small pieces + mini box* for storage
*Bonus: Package it cutely! Wrap your mini boxes in the papers you are using and paint lids in coordinating colors to create picture perfect kits!
Additional items to set on craft table
- mod podge
- scissors
- pencils
- rulers
- basic white washi tape
- extra paper scraps
- extra gold foil sheets + adhesive & sealant supplies
- water cups + water
- paper towels
- variety of paint brushes
- assortment of paints in colors that work within your palette
- clear spray varnish (for finishing touch to seal all elements on coasters)
– How To –
As easy as 1, 2, 3 (and 4, 5 & 6!)
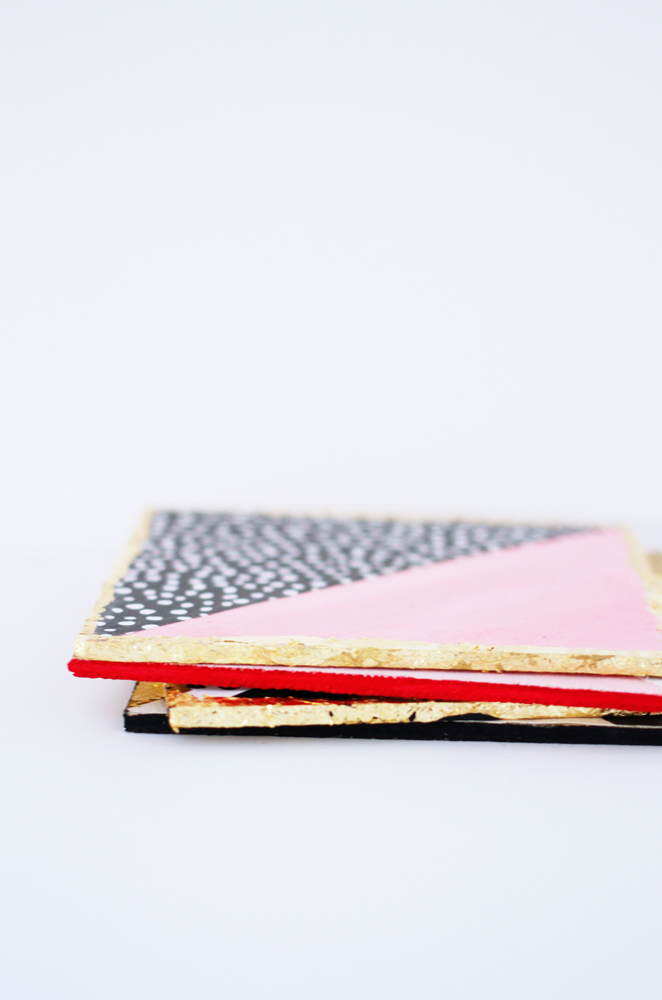
- Determine a design for the coasters. Will they be the same or unique? (I went for 4 unique designs that all coordinate together with diagonal lines).
- Use ruler and pencil to create the diagonal lines/designs that you desire.
- Using drawn lines as guides, utilize washi tape and be sure to tape off the areas that will be painted. This will provide a nice, straight edge.
- Get your collaging hat on! You can also use paper scraps to fill in your designs (triangles in this case) – simply cut to shape & size, then adhere directly to the wood with Mod Podge. You can also cut hearts or other shapes to glue on top.
- Gold foil details will take your coasters to the next level. Simply add a touch here or a trim there for that extra bit of shine. If you’ve never gold leafed before, it is easy breezy. You’ll just need this kit and I suggest watching a YouTube tutorial. The first part of this video is the best one I found that describes the method I use.
- Lastly, once everything is set and dry, you will want to spray the entire coaster with a clear varnish which should help to protect it from water damage. Instead of the spray varnish you could paint a coat of Mod Podge over the top, though if you have any gold leaf, I would recommend the spray. Additionally, if you wanted to go all out, you could adhere a 4×4 clear glass square onto the top of the coaster.
TIP no.3: GATHER THE GOODS & SET THE TABLE
Once you’ve selected your colors and your individual kits are assembled, you’ll want to set your craft table with all of the extra tools and needed supplies. This is where I would also set out a plethora of other miscellaneous craft supplies (within your color palette) and tools so your crafty friends can really get out of the box and create as they wish! Next, make sure to set out bowls and plates of snacks (think finger foods!) Nothing too messy. You want snacks that are easy to eat while crafting. It’s also nice to have have a drink cart nearby for easy access.
Happy Galentine’s crafting!
XO Brynn | Dandy & Fine Parties
p.s. Thank you so much to my Greenvelope friends for having me over today!
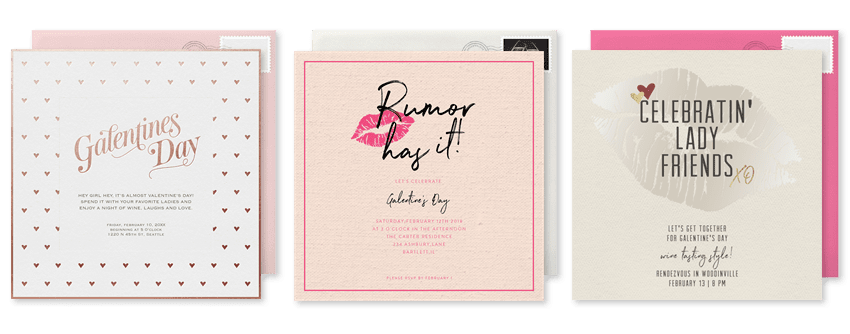
Greenvelope offers a variety of festive designs, perfect for any Galentine’s Day celebration! See the full collection here and let the planning process begin!